Create a Booking Page
Step-by-step guide to creating your first Calendox booking page — durations, timezone, destination calendar, meeting link, and sharing the link.
Creating a booking page takes a few minutes: name the page, set your meeting durations and hours, pick the calendar bookings should land on, choose a meeting link, and share the generated URL. This guide walks through a first page with the default settings.
Prerequisites
At least one connected, writable calendar — this is where booked events are created. See Connect Google Calendar or Connect Microsoft Calendar. Booking pages are available on the trial and on paid plans — see Bookings plan availability.
Steps
1. Go to Bookings
In the dashboard, click Bookings in the sidebar.
2. Click "New Booking Page"
The editor opens with sensible defaults: a 30-minute duration, a 9:00–18:00 weekday schedule, and a 60-day booking window.
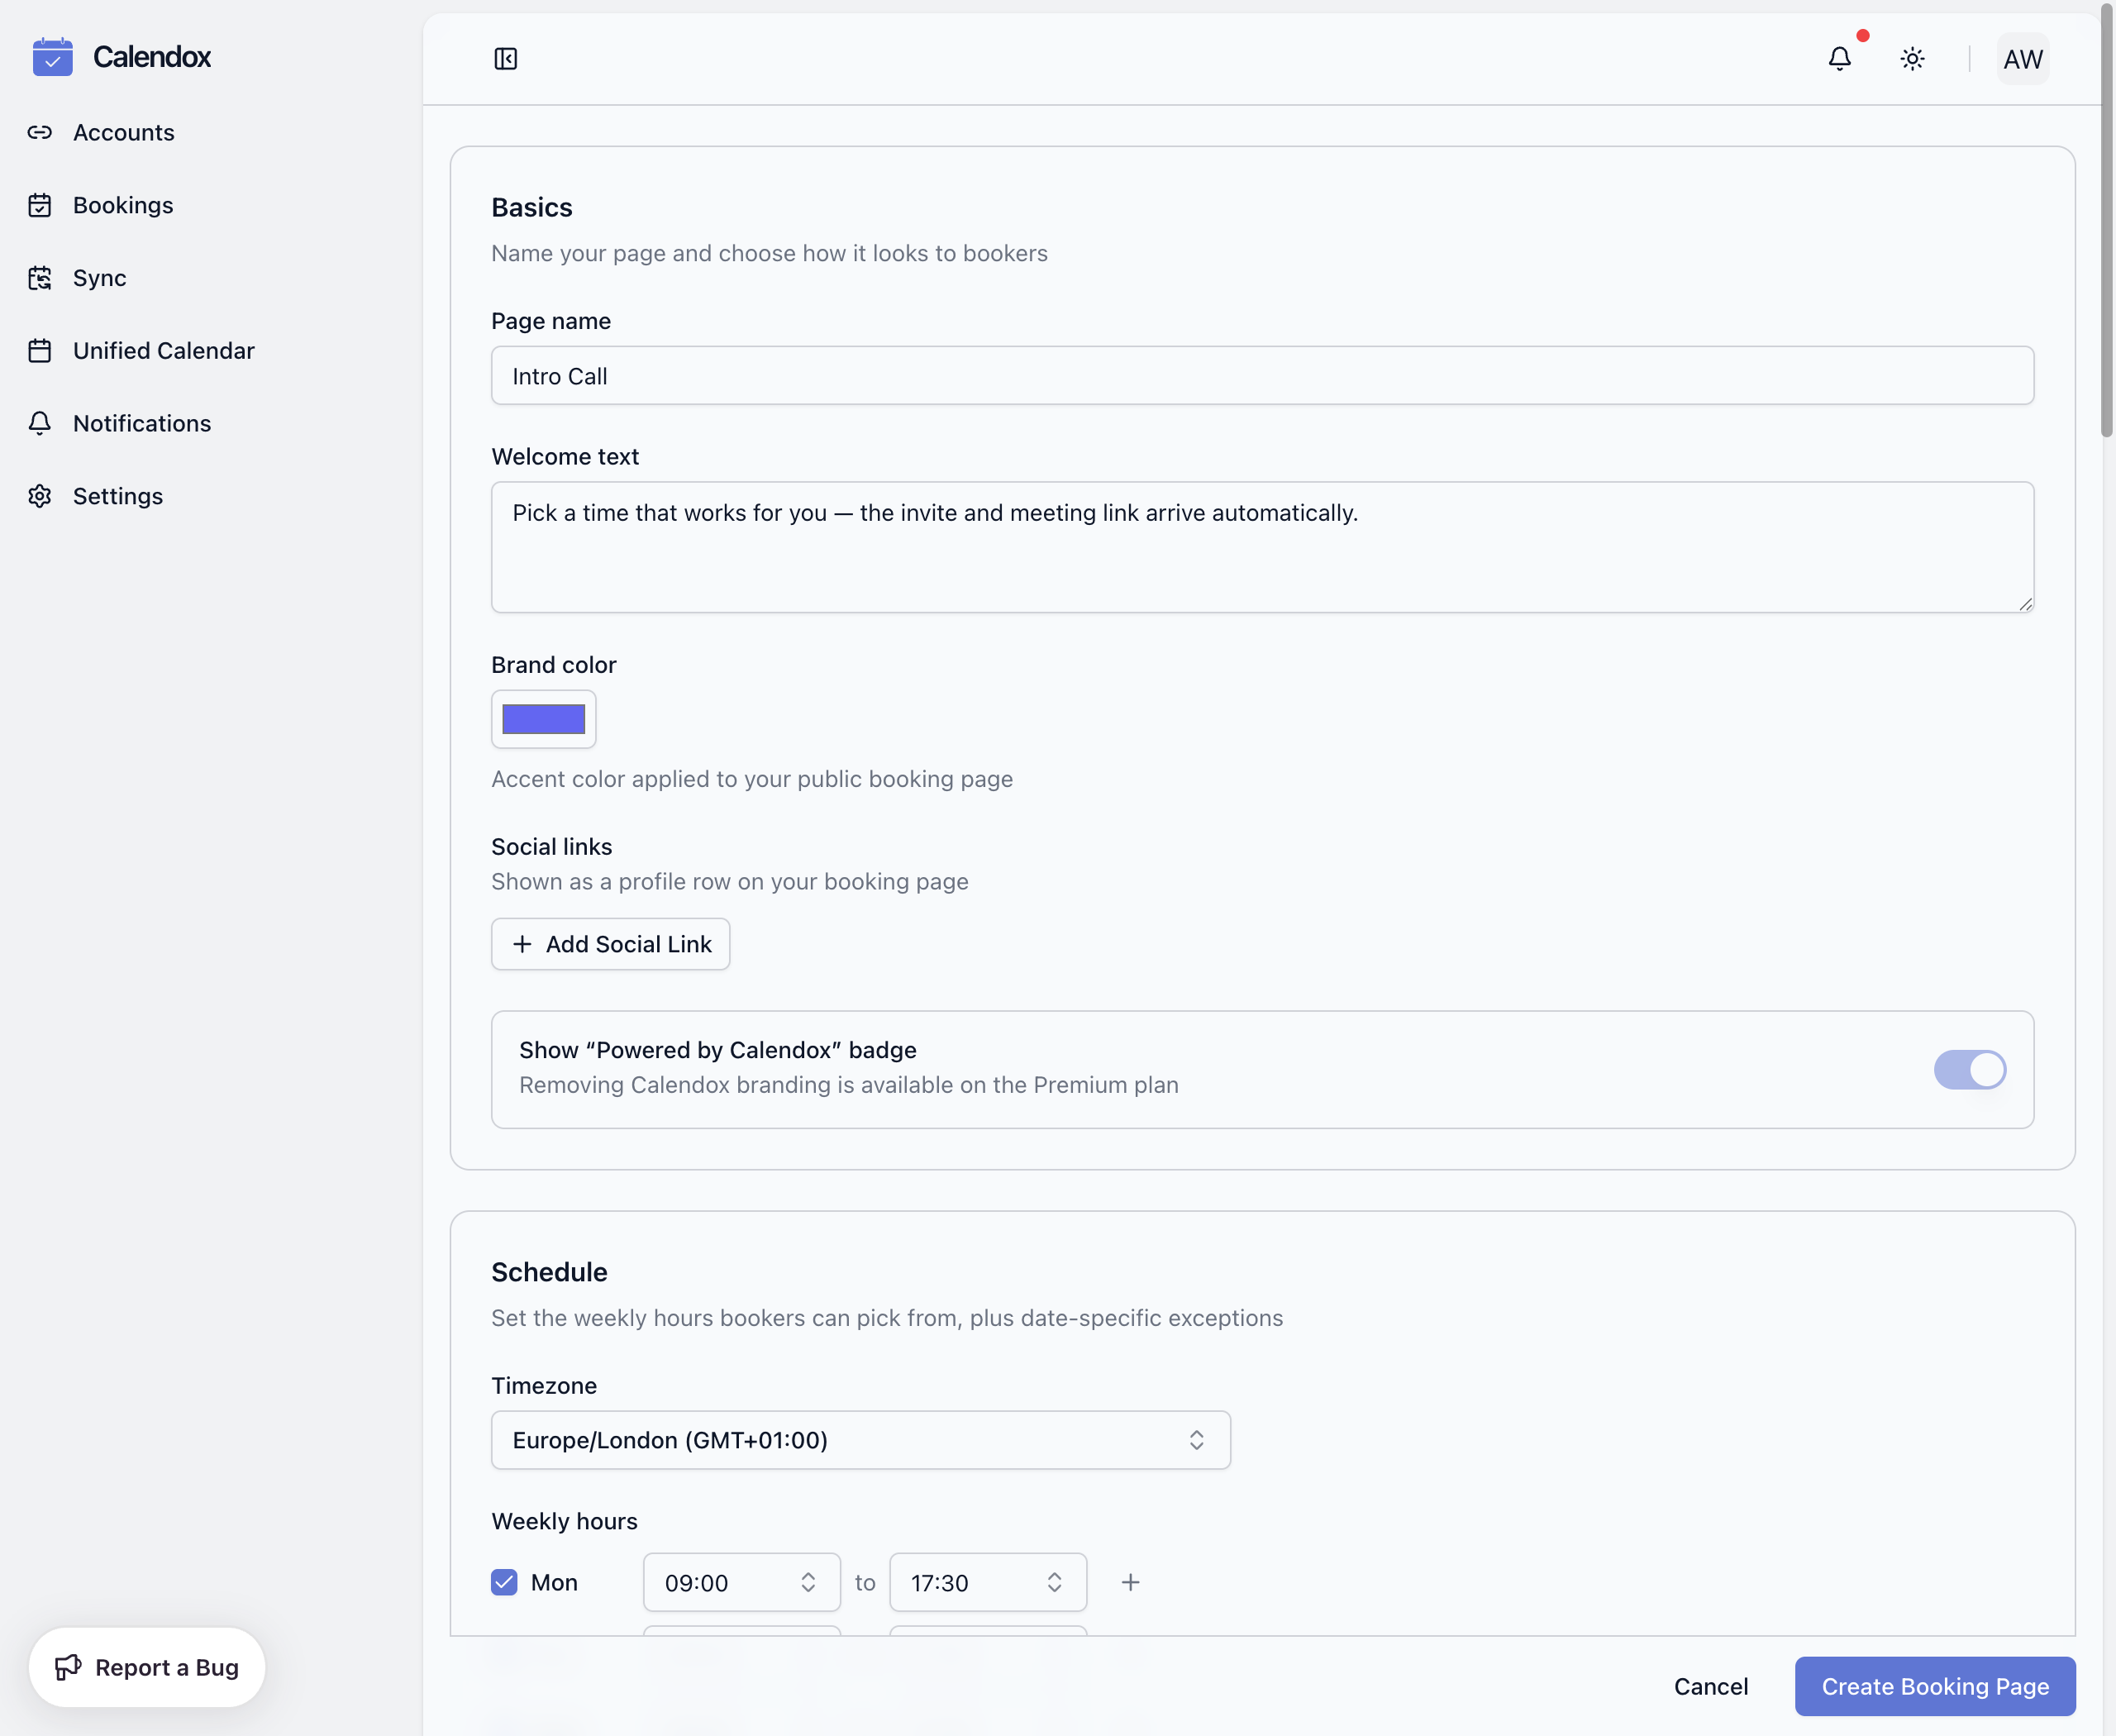
3. Name your page
Under Basics, enter a Page name (for example "Intro call") and an optional Welcome text shown at the top of your public page. You can also set a Brand color and add social links.
4. Set your meeting durations
Under Rules, add your Meeting durations (minutes) — up to 4 options between 5 and 480 minutes. If you add more than one, the booker picks a duration on the public page.
5. Set your timezone and weekly hours
Under Schedule, choose the Timezone your hours are defined in, then set your Weekly hours — the windows bookers can pick from. Bookers see slots converted to their own timezone automatically.
6. Choose the destination calendar
Under Calendars, select the Destination calendar — booked events are created on this calendar. Only writable calendars appear here. By default, busy time on all your connected calendars hides slots; see Availability and scheduling to change that.
7. Choose a meeting link
Under Event, pick a Meeting link: Google Meet, Microsoft Teams, Zoom, or None. Availability depends on your destination calendar's provider — see Meeting links and location.
8. Create and copy your link
Click Create Booking Page. Back on the Pages tab, use the copy icon on the page card to copy your booking link — or open the page again with Edit to find the full Links section with QR codes and private links.
What happens next
- Anyone with the link can pick an open slot and book — no Calendox account needed.
- Each confirmed booking appears as a real event on your destination calendar with the booker invited as an attendee, and both of you receive a confirmation email.
- The booker's confirmation email includes a private link to reschedule or cancel — see Manage bookings.
Next steps
- Fine-tune slots with buffers, minimum notice, and per-day caps: Availability and scheduling
- Ask bookers questions or require your approval: Questions and approvals
- Share the page with a QR code or embed it on your site: Share links, QR codes, and embeds
What is Bookings?
What Calendox booking pages are — public scheduling pages with availability checked live across all your connected Google and Outlook calendars.
Availability and Scheduling
How Calendox calculates booking availability — free/busy across all connected calendars, weekly hours, date overrides, buffers, notice, and caps.