
Create Your First Sync
Step-by-step guide to creating a one-way or multi-way calendar sync in Calendox — sync types, calendar selection, sync properties, troubleshooting.
Creating a sync takes under a minute: pick a sync type, select the calendars, choose which event fields to copy, and submit. The initial copy runs immediately, and from then on every new event, edit, and deletion propagates automatically in seconds — Google and Microsoft notify Calendox when an event changes, so there's no polling schedule.
A one-way sync copies events from one source calendar into one or more targets; a multi-way sync keeps two or more calendars mutually identical. Both work across providers — Google to Outlook, Outlook to Google, or within one provider.
Prerequisites
At least two imported calendars — see Connect Google Calendar or Connect Microsoft Calendar — and an available sync slot on your plan. In a one-way sync, the targets must come from a different connected account than the source; in a multi-way sync, every calendar must come from a different connected account.
Steps
1. Go to Sync
In the dashboard, click Sync in the sidebar.
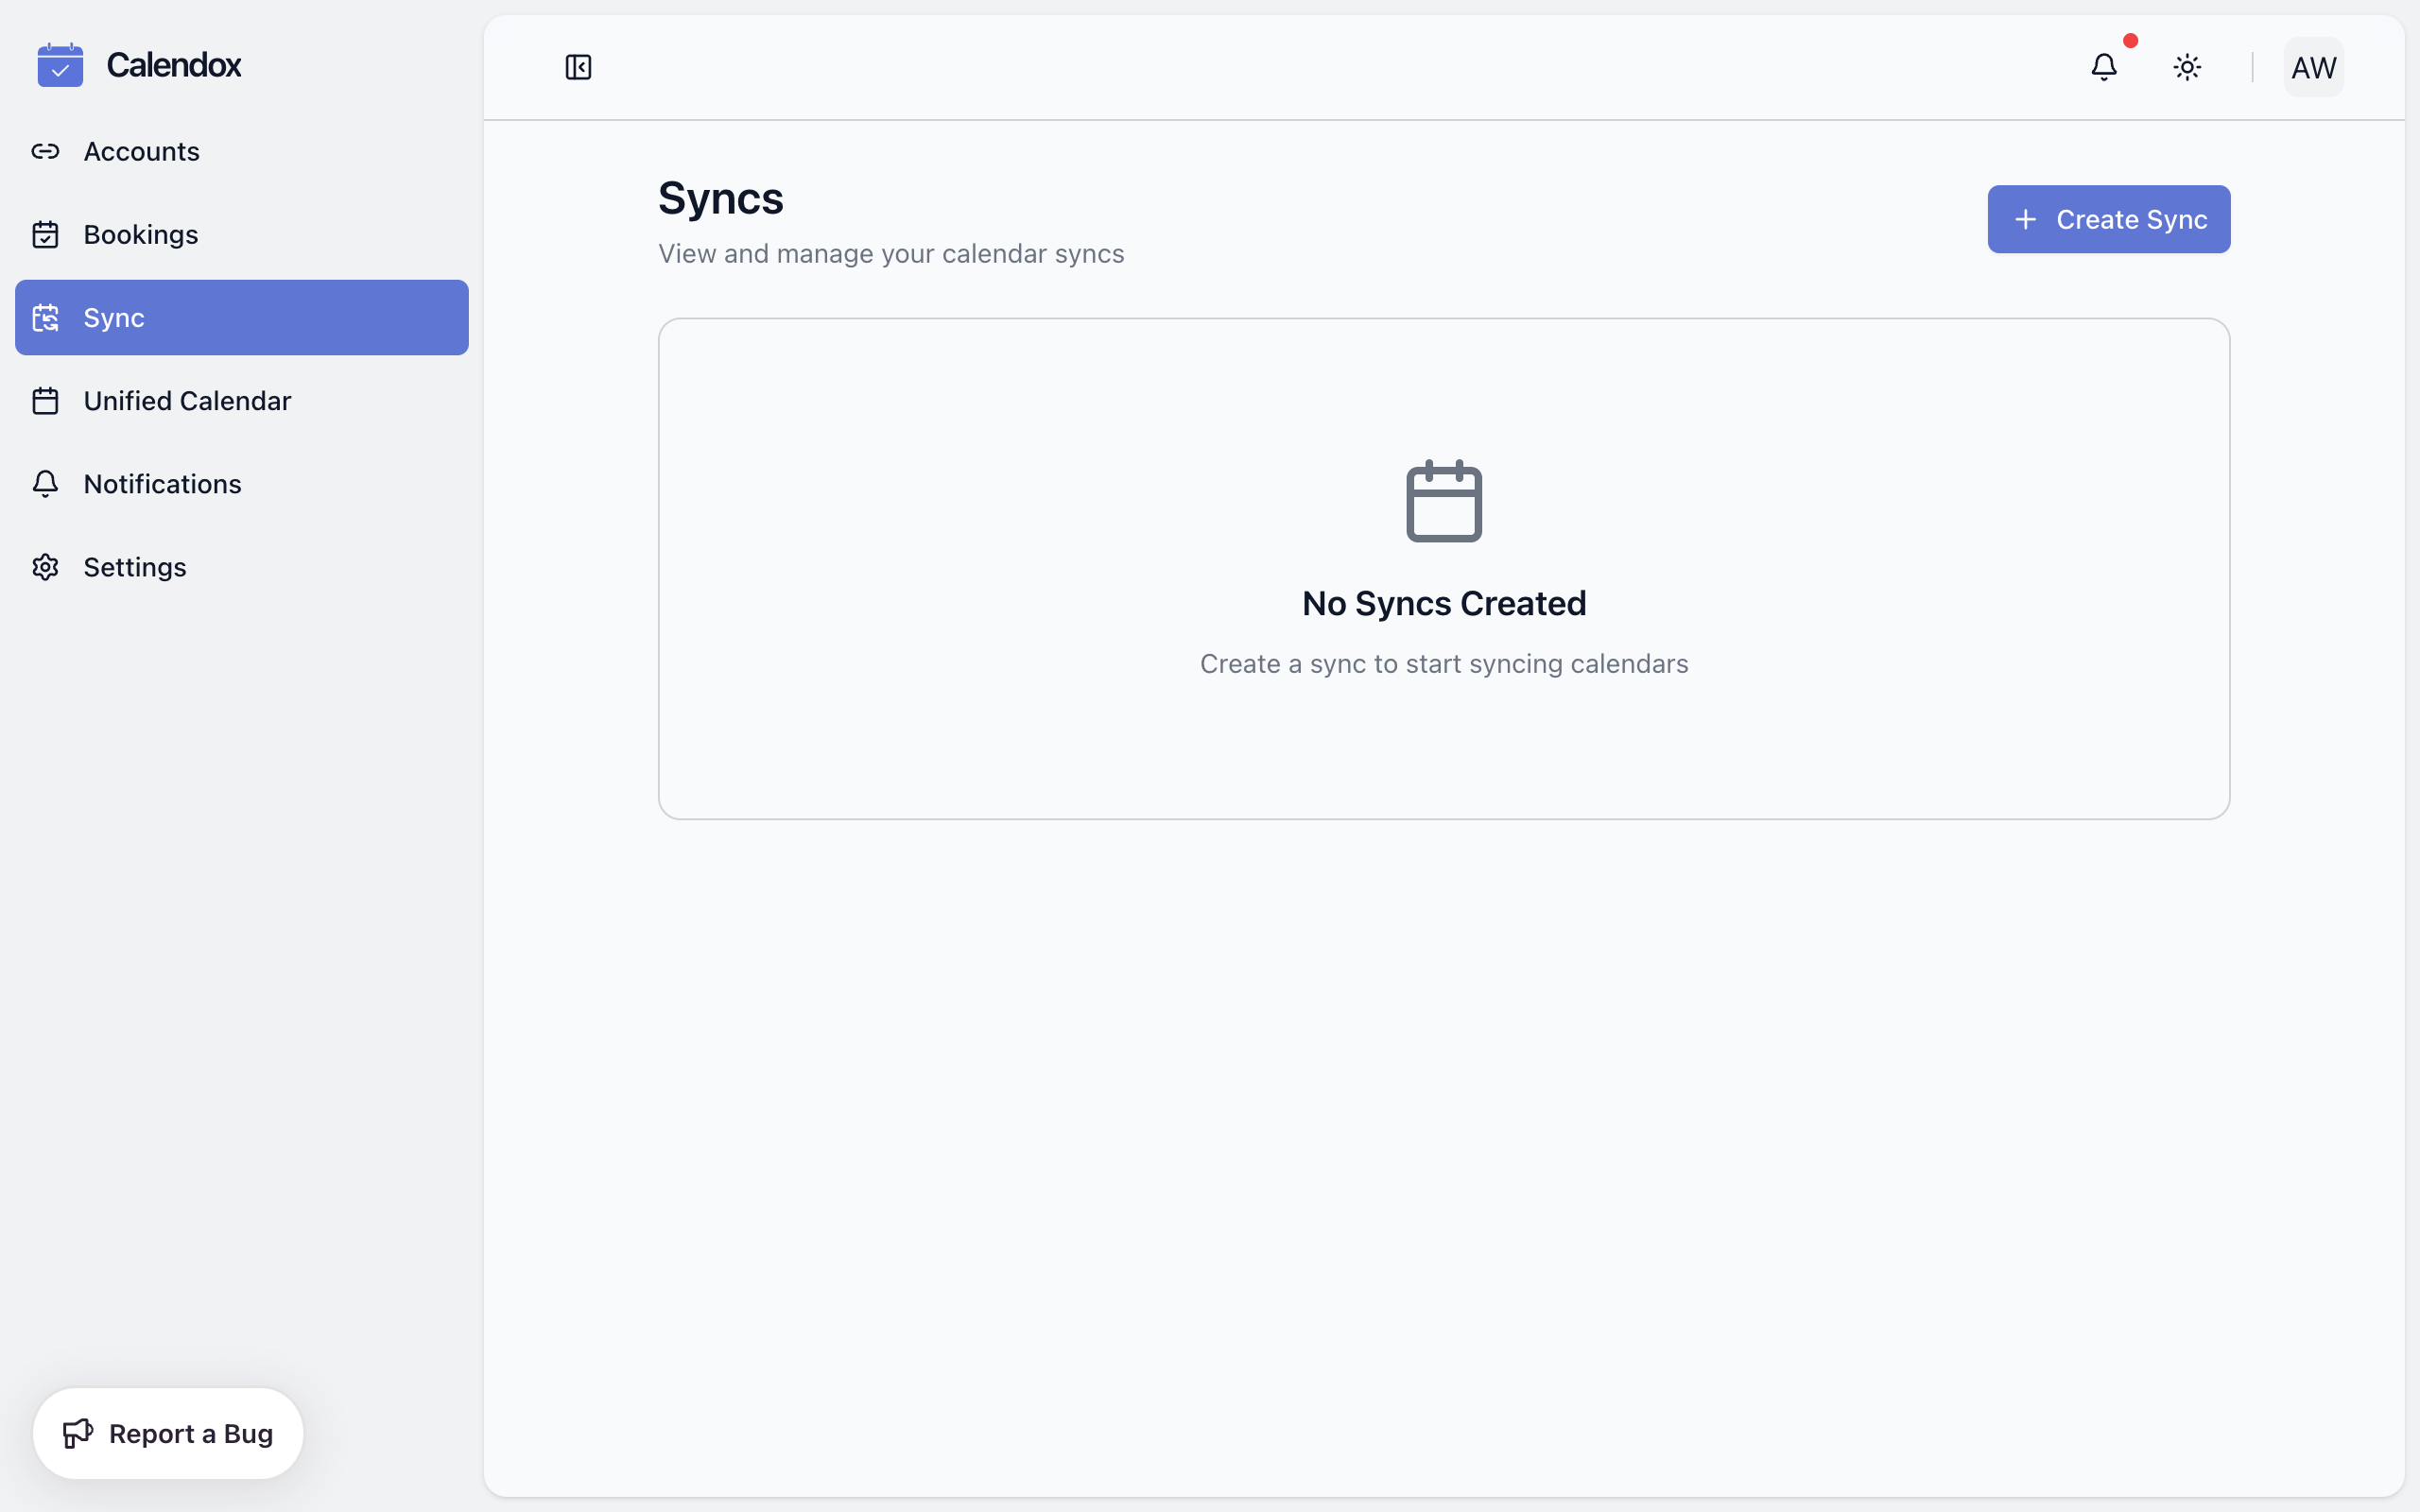
2. Click "Create Sync"
Click the + Create Sync button in the top right corner.
3. Choose a label and sync type
Enter a Sync Label to identify the sync, then select One-way (events flow from source to target only) or Multi-way (all selected calendars stay mutually in sync). A live preview on the right shows how each mode behaves.
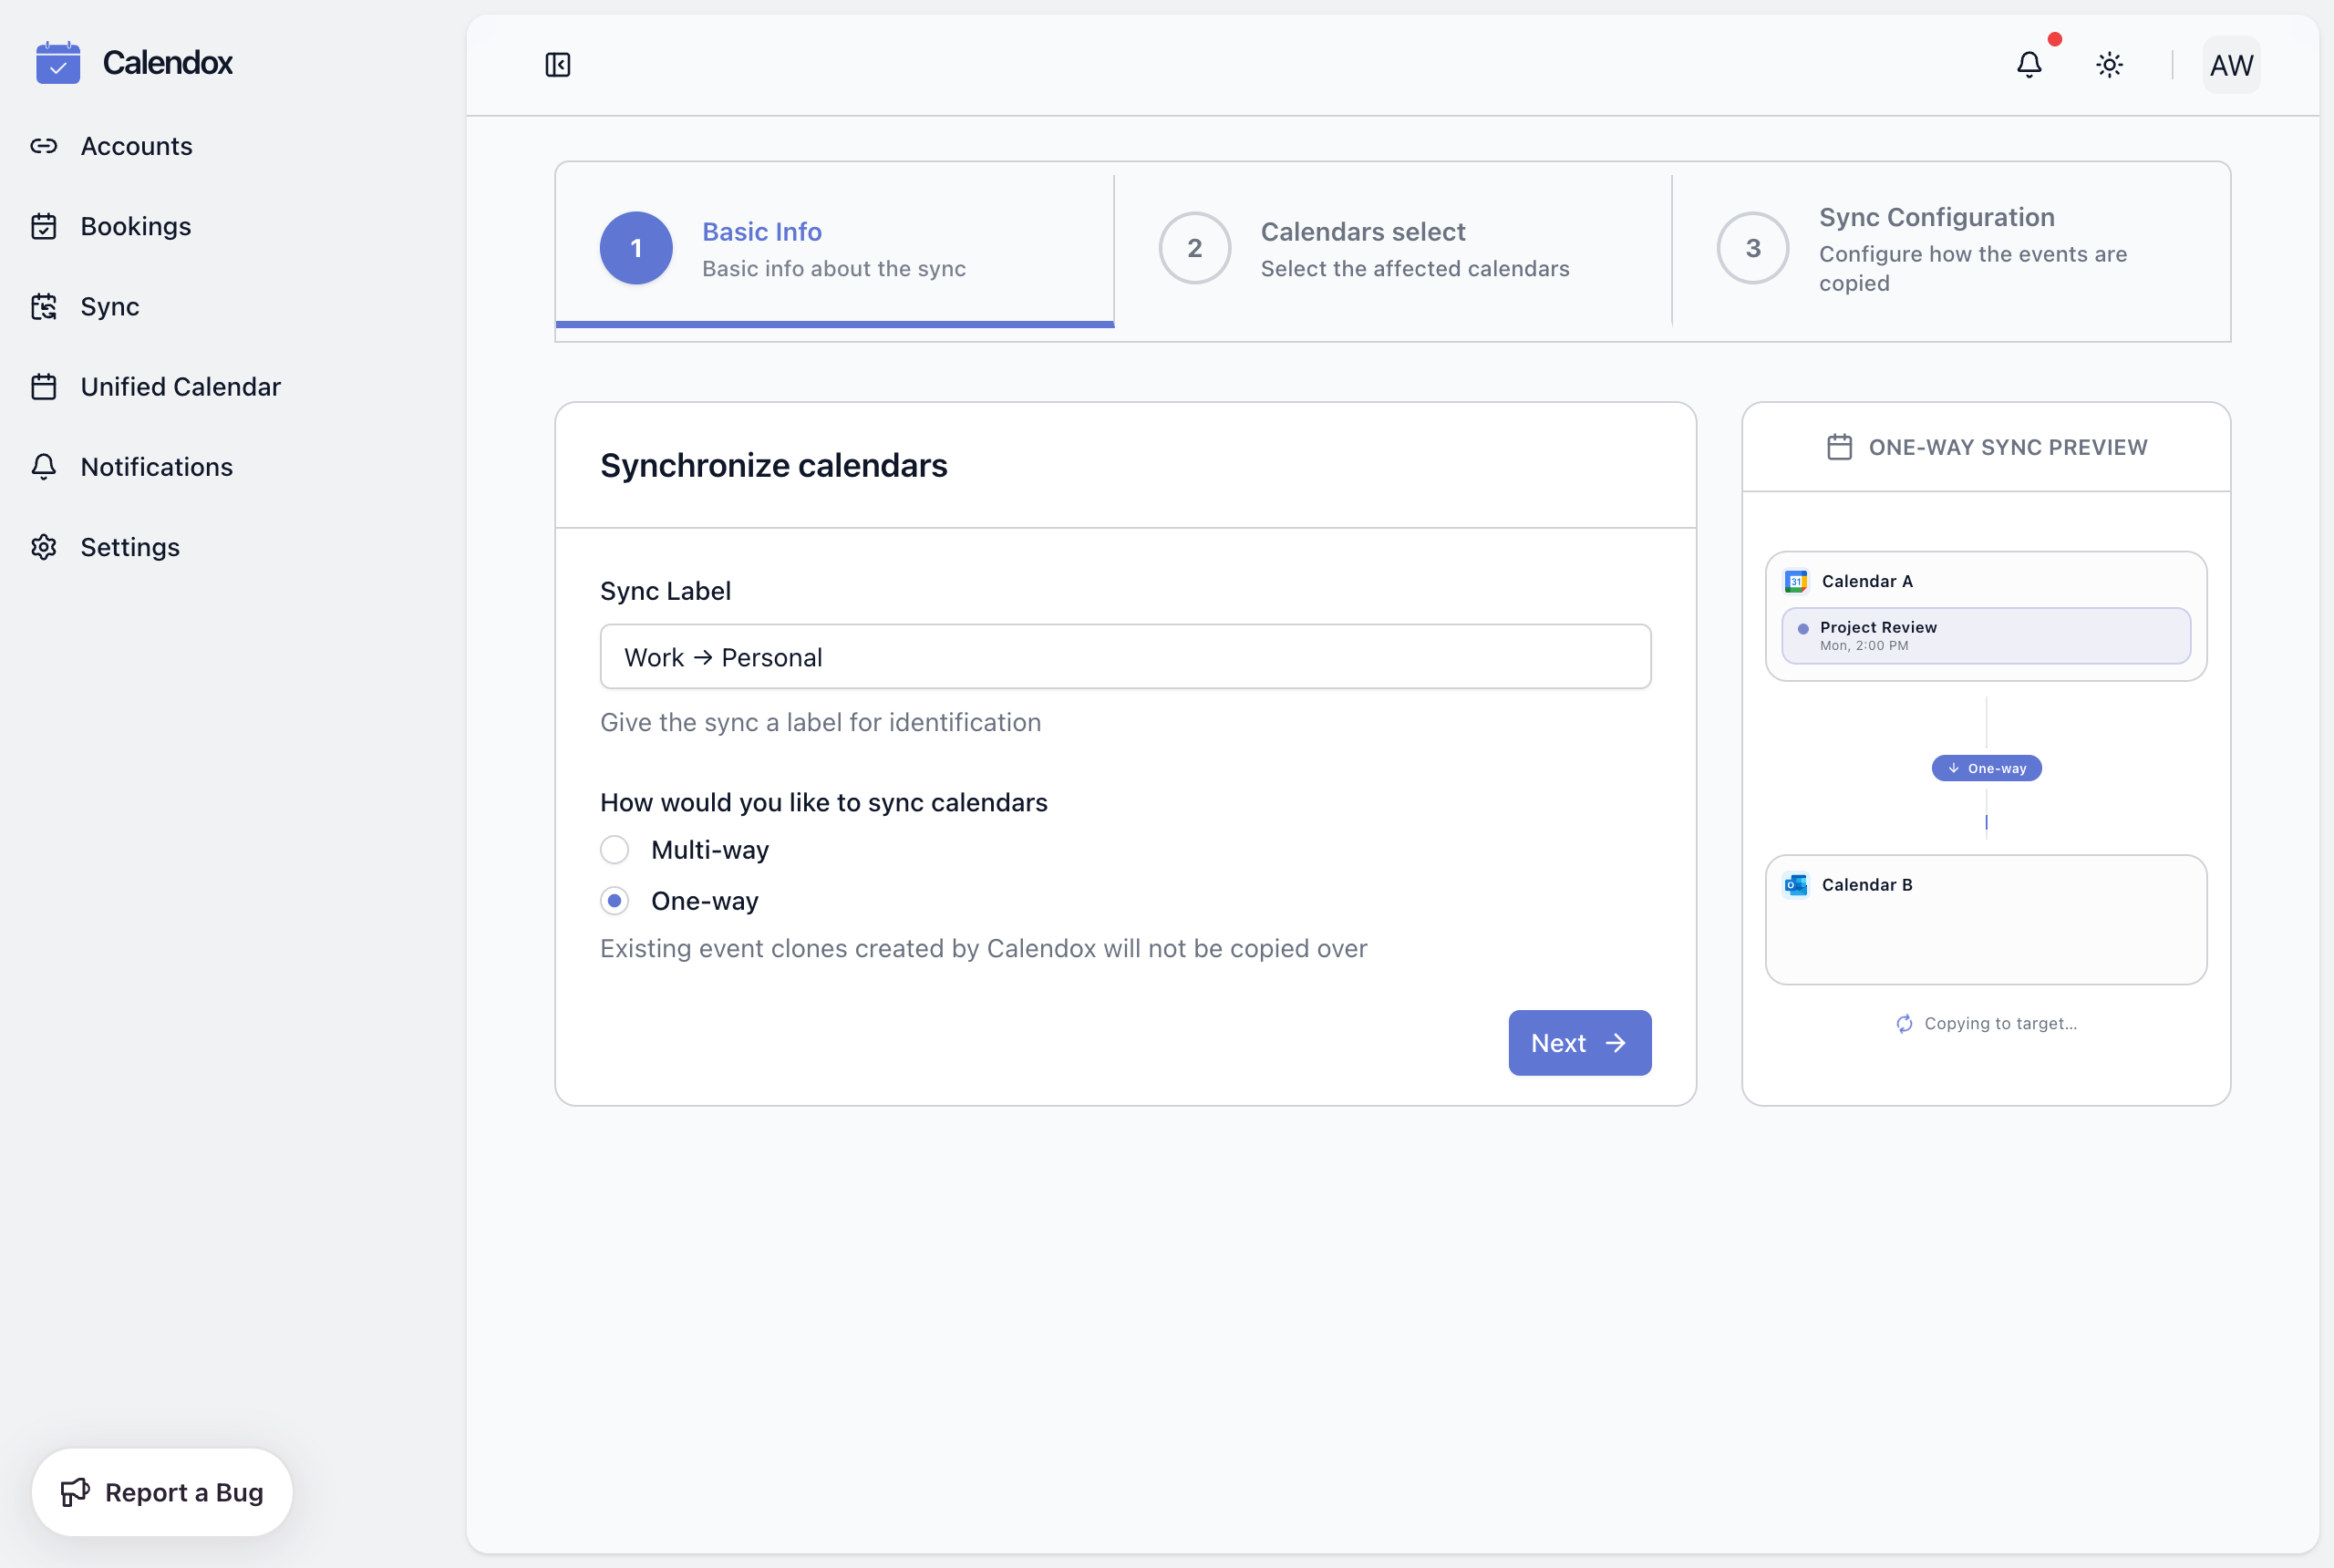
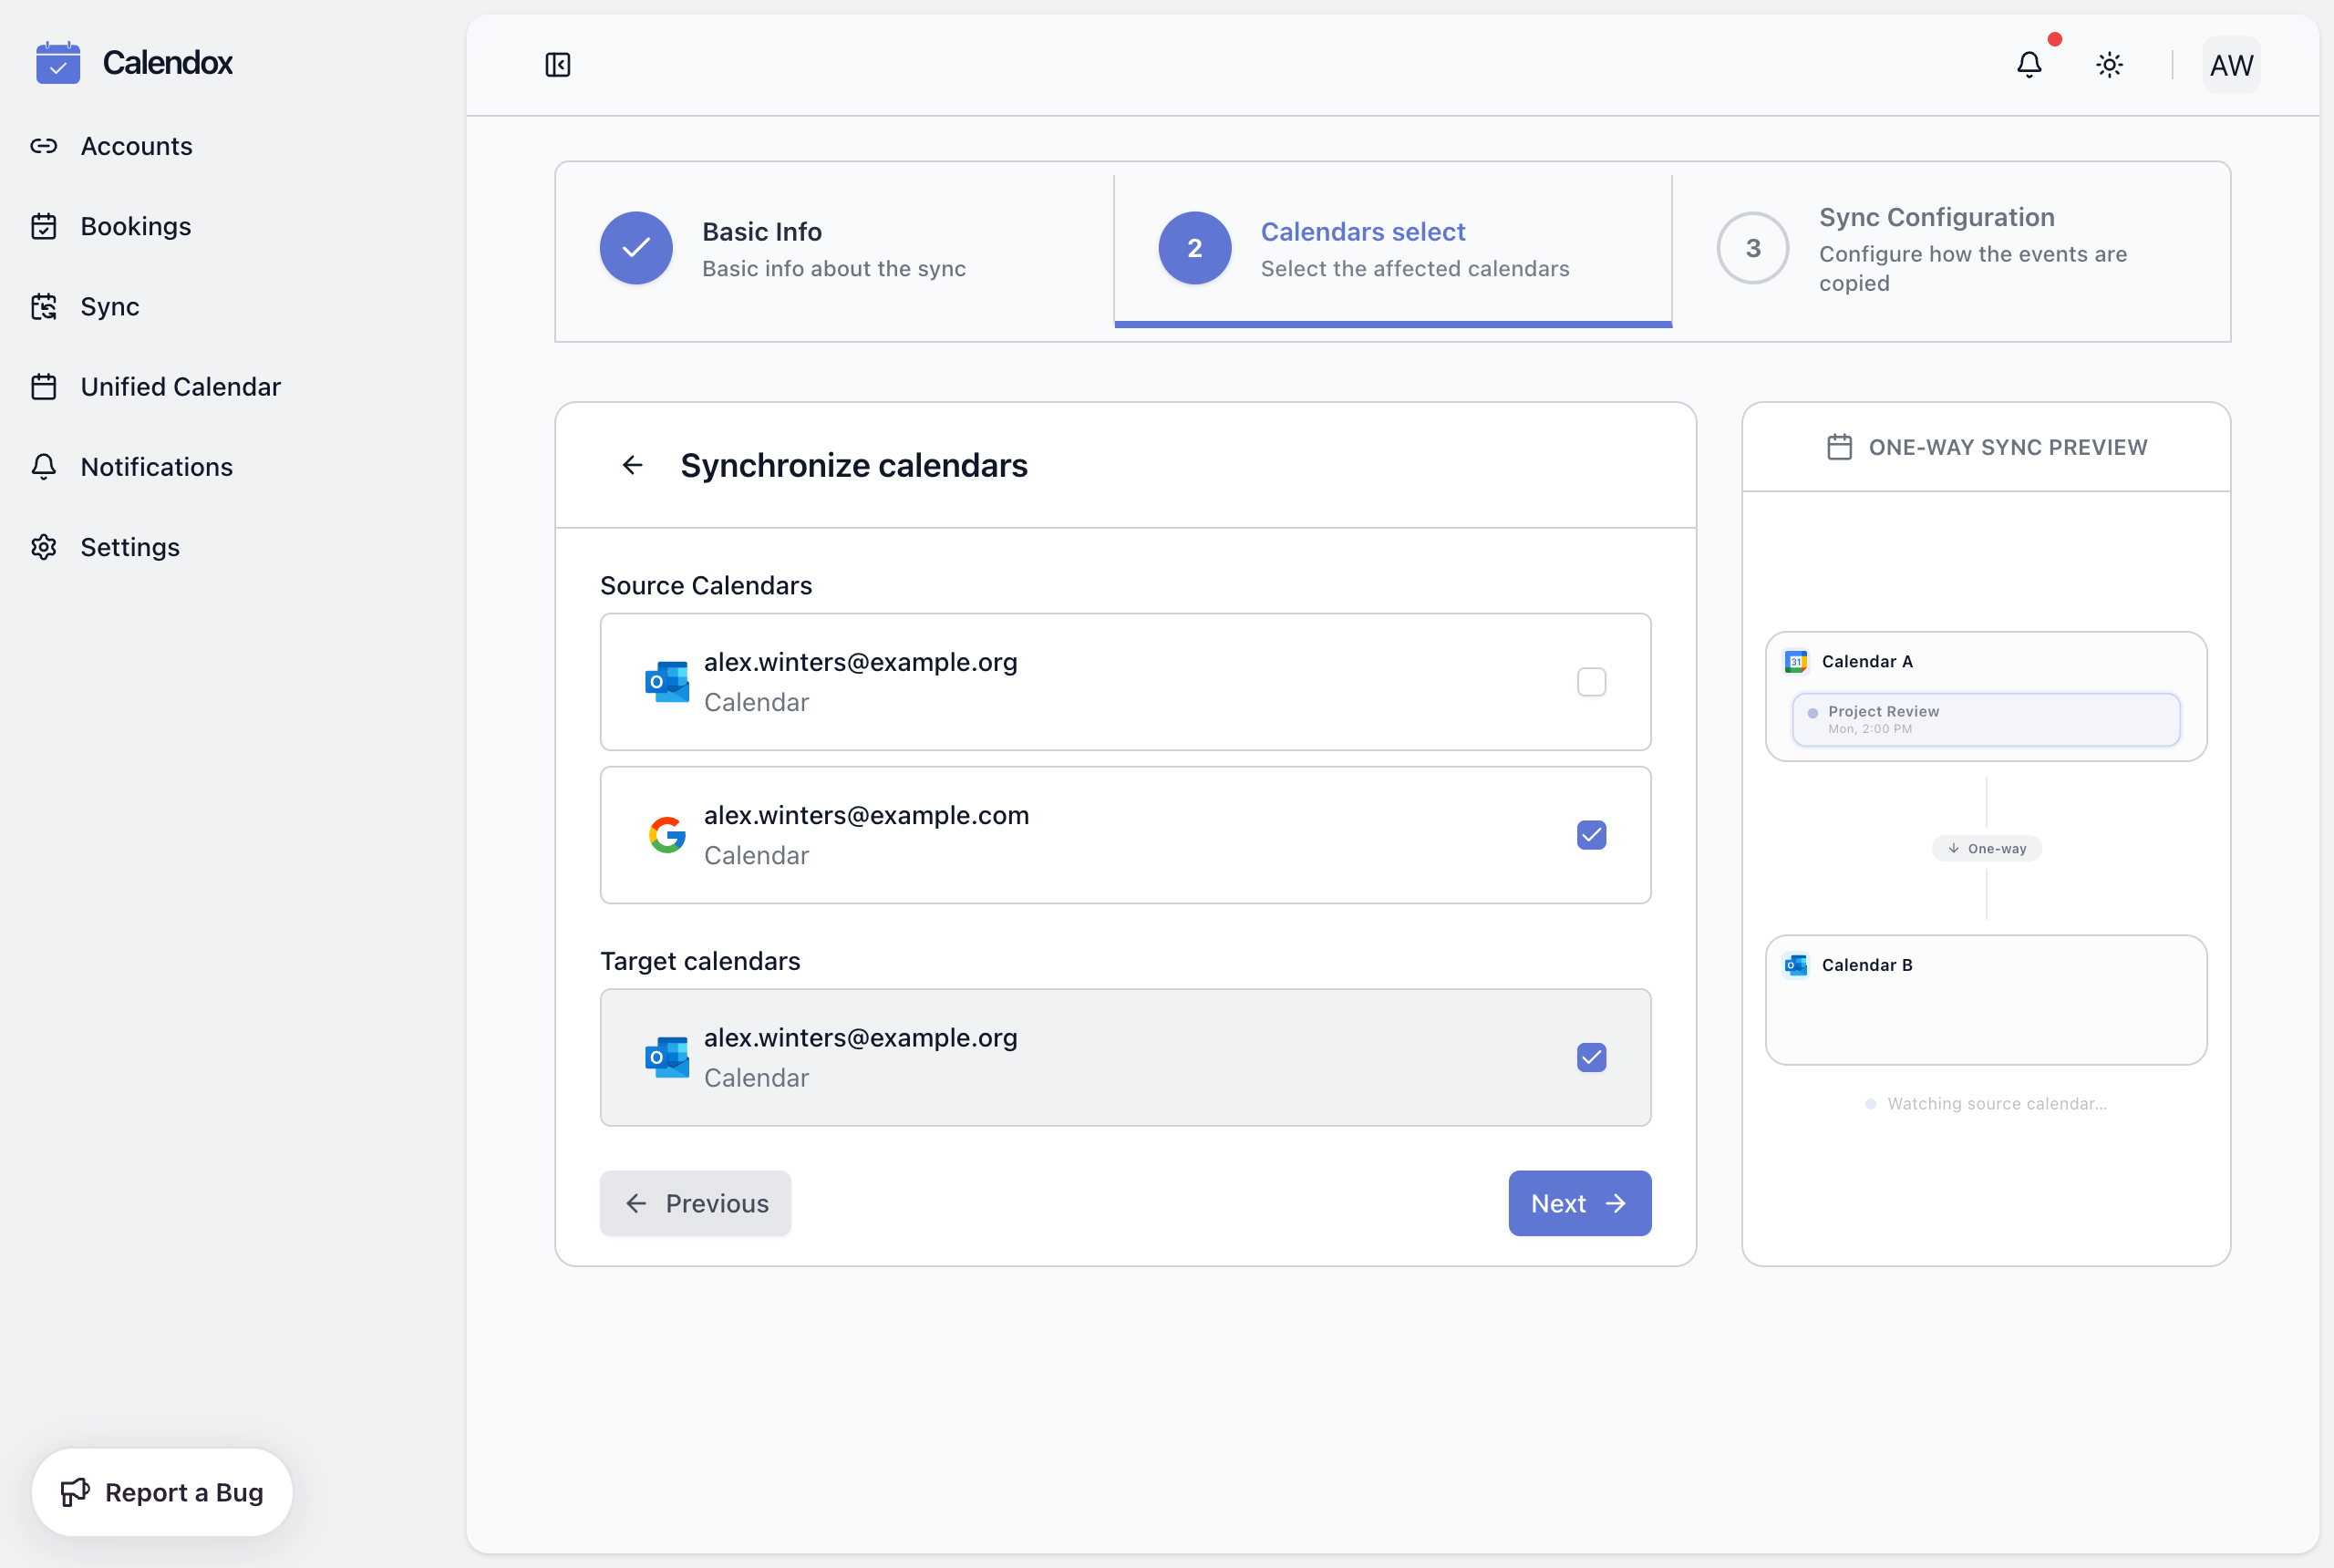
4. Select calendars
For a one-way sync, pick exactly one calendar under Source Calendars and one or more under Target calendars. For a multi-way sync, pick two or more calendars under Sync Calendars. Your Google and Outlook calendars all appear in the same list — mixing providers is fine.
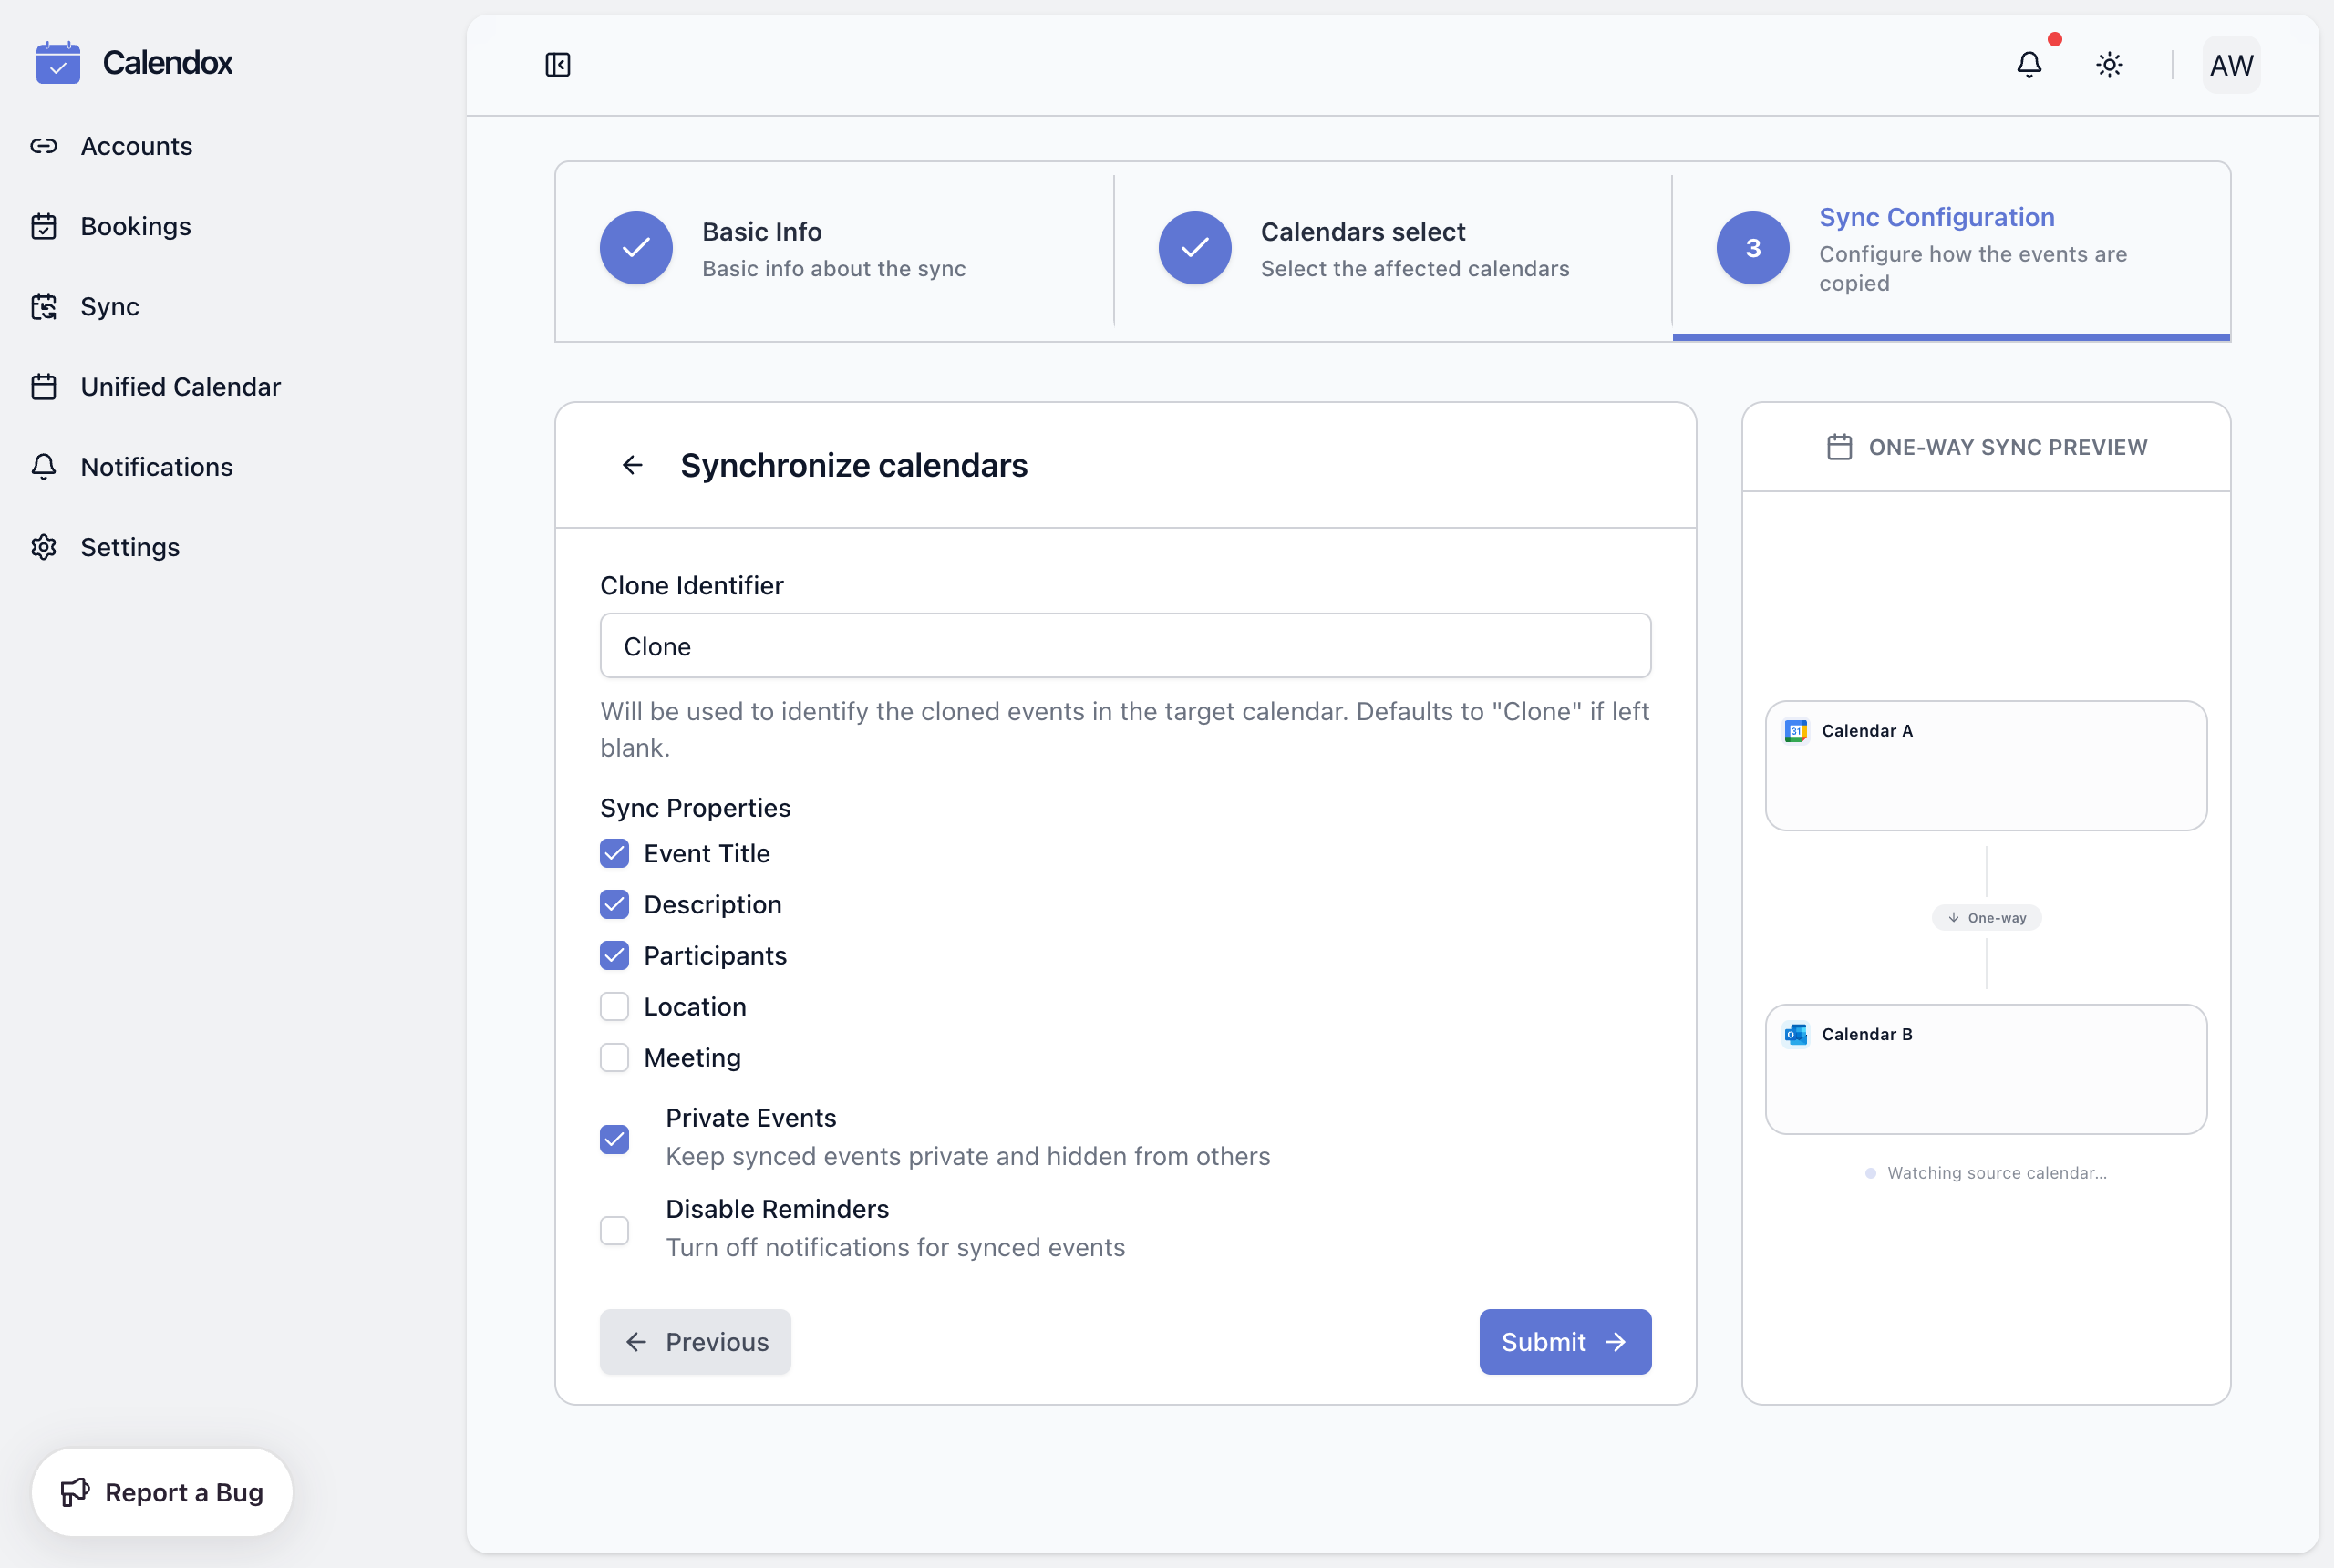
5. Configure sync properties
Choose what each synced copy carries. In a multi-way sync, the same settings apply to the copies made in every direction:
- Sync Properties — which event fields to copy: Event Title, Description, Participants, Location, and Meeting (the meeting link). Unticked fields are left off the copies.
- Clone Identifier — a short label stamped on synced copies so you can tell them apart from originals in the target calendar.
- Private Events — mark synced copies as private, hiding their details from others who can see the target calendar.
- Disable Reminders — synced copies are created without notifications, so you're not reminded twice for the same event.
Click Submit to create the sync.
What happens next
- The sync starts in Pending while the initial copy runs, then switches to Active. Large calendars take longer on this first pass.
- From then on, new events, edits, and deletions propagate automatically within seconds of the change — see Sync status for every status value.
- Synced copies appear in the target calendar carrying your clone identifier, and in the Unified Calendar alongside the originals.
What are the rules for combining calendars?
| Rule | Why |
|---|---|
| A calendar can belong to only one sync — any status, including disabled or failed | Overlapping syncs would duplicate events or create loops |
| In a one-way sync, source and targets must come from different connected accounts | Syncing a calendar onto its own account duplicates events without adding availability |
| In a multi-way sync, each calendar must come from a different connected account | Every calendar is a source and a target of the others, so two calendars on one account would duplicate events in it |
| One-way: exactly one source, one or more targets | The source is the single origin of truth for that sync |
| Multi-way: two or more calendars | Every calendar is both source and target |
Troubleshooting
- The sync stays in Pending for more than a few minutes. Large calendars can legitimately take a while on the first pass; if nothing changes, follow the sync status guide.
- "One or more selected calendars are already part of a sync." A calendar can belong to only one sync, and disabled or failed syncs still count. Delete the existing sync first, then create the new one.
- "Cannot sync calendars from the same connected account." Pick calendars that live in different connected accounts — in a multi-way sync, one calendar per account. The account pickers already hide most invalid one-way combinations.
- A calendar is missing from the selection list. It either isn't imported yet (import it from Dashboard → Accounts) or — in a one-way sync — belongs to the same connected account as a calendar you already picked on the other side.
- Sync creation is blocked by your plan. Every sync occupies a plan slot regardless of status — delete Disabled or Failed syncs to free slots, or see Plans and billing.
Next steps
- One-way sync and Multi-way sync — how each mode handles events in depth
- Sync status — what Pending, Active, Disabled, and Failed mean
- What is Bookings? — with calendars connected, let people book time with you
Connect Microsoft Calendar
How to connect your Microsoft account to Calendox and import Outlook calendars — authorization, admin consent, supported calendars, and errors.
What is the Unified Calendar?
What the Calendox Unified Calendar is — all your connected Google and Outlook calendars in one color-coded view, with six views and per-calendar filters.